How do you make your dream blog a virtual reality?
You break down your to-do list into smaller bite-sized chunks of course!
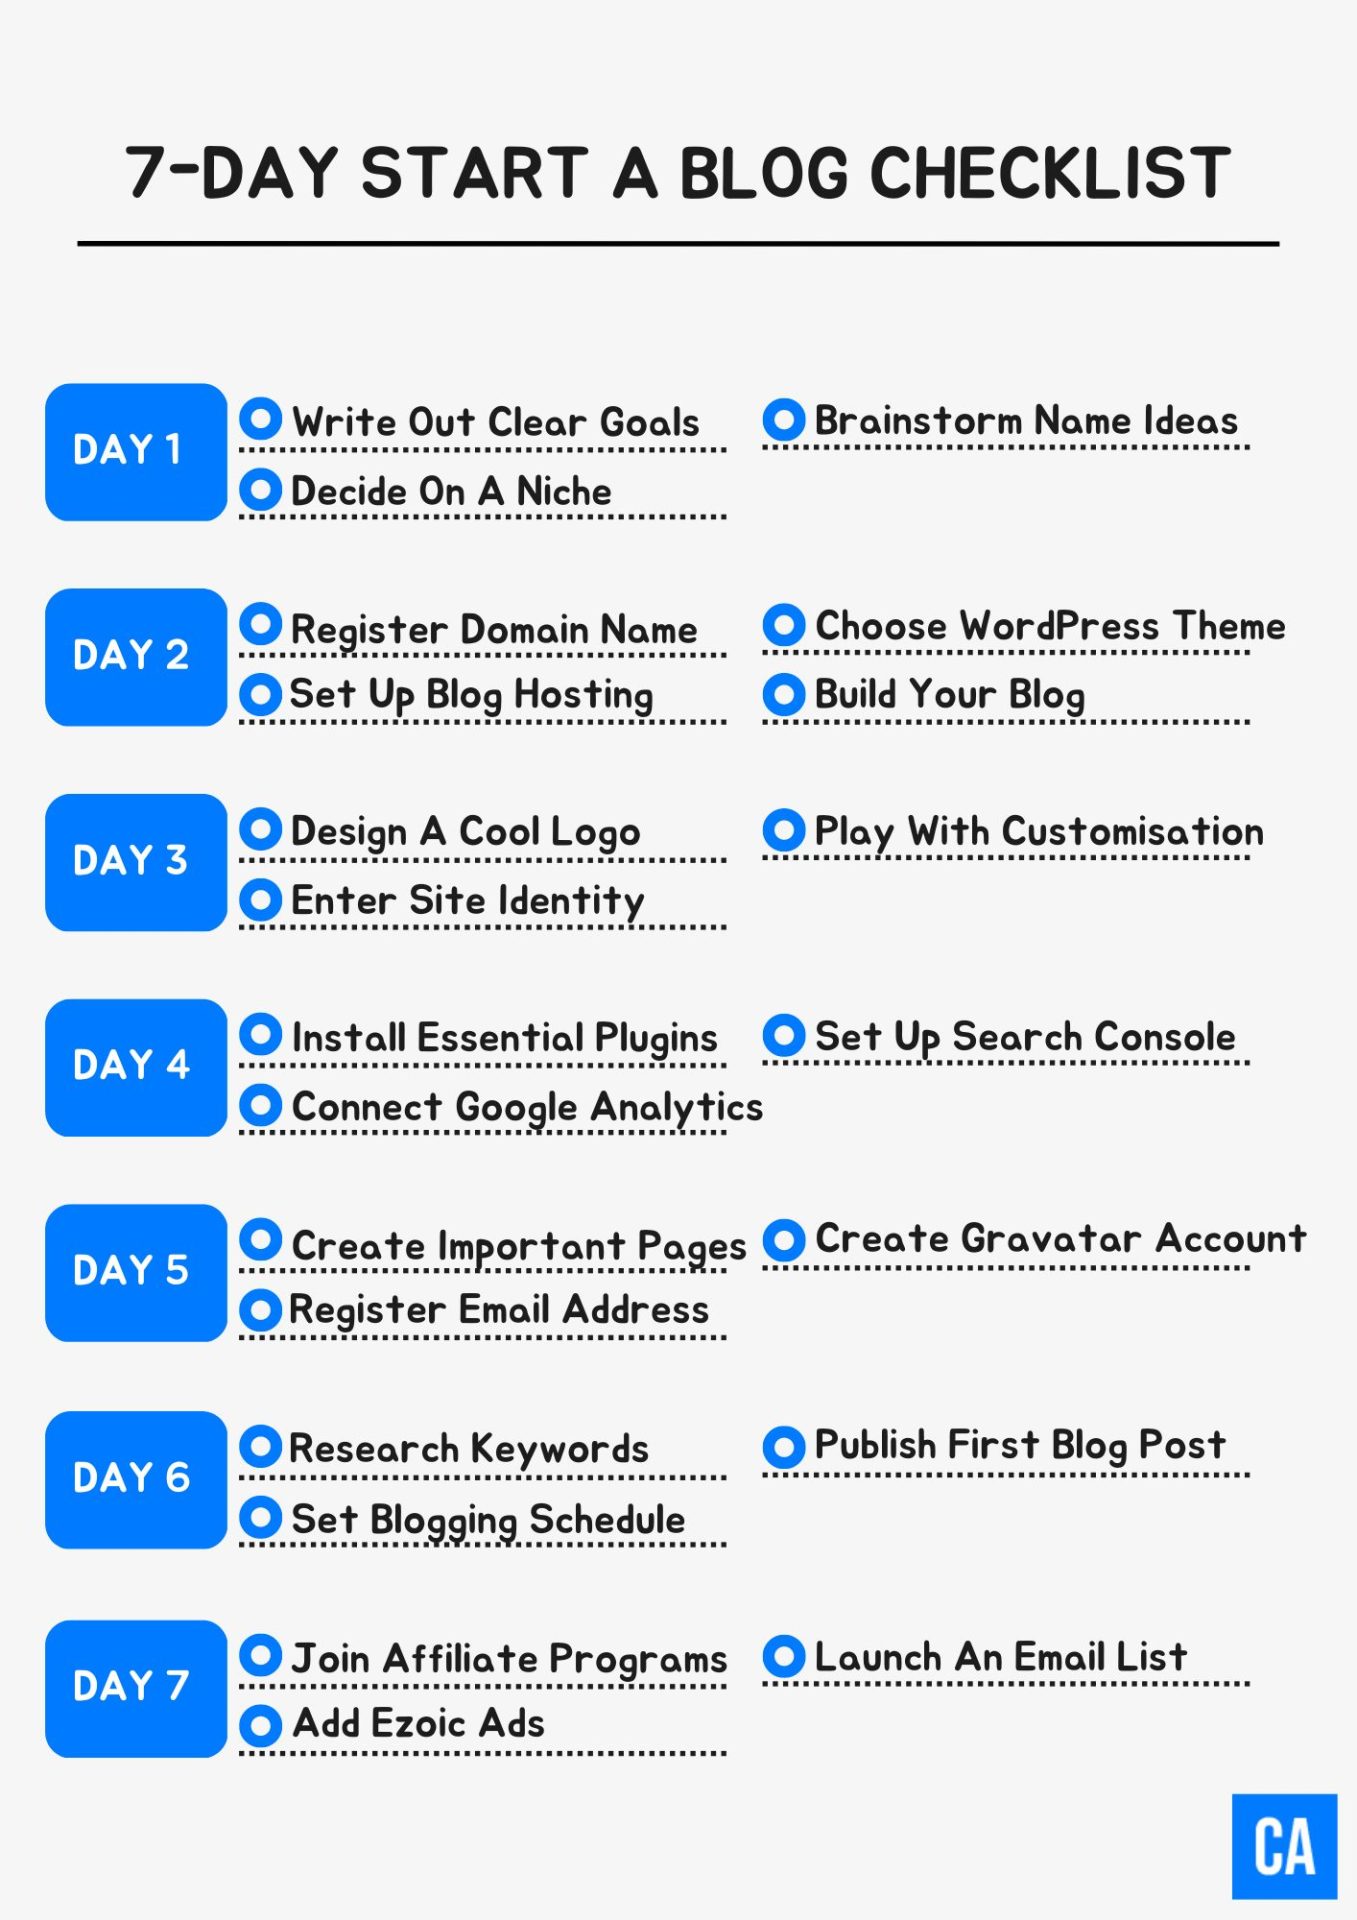
And with this Blog Launch Checklist, starting a blog won’t be a slog. We’ve listed out 22 to-dos and broken them down into 7 days so you can work through them one by one.
“There is only one way to eat an elephant: one bite at a time.”
So don’t forget to bookmark this page—it’s going to be your best friend over the coming week.
Scroll down to view it, and don’t forget to download your printable Start A Blog Checklist PDF!
Day One ☑️
1. Write Out Clear Goals
Looking to express yourself creatively? Want to share your knowledge and expertise? Planning on turning blogging into a full-time income?
Whatever your reason for starting a blog, figuring out your big “why” is what will keep you in the game in the days and weeks ahead.
2. Decide On A Niche
Choose a niche or topic that your blog will be about based on your passions, interests and hobbies. Coming at a topic from a new and fresh angle will help your blog stand out from the rest.
3. Brainstorm Name Ideas
Come up with a blog name that’ll represent you and your brand. Keep it short, simple, easy to spell and easy to remember. Avoid numbers and hyphens.
Use a thesaurus or a blog name generator to help get the ideas flowing.
Day Two ☑️
4. Register Domain Name
A domain name is what people type to go to your blog and usually starts with www. and ends with .com. Domains cost around $15/year but you can register yours for free with Wealthy Affiliate.
5. Set Up Blog Hosting
A blog hosting company stores all of your posts, files and images so your blog shows up when readers visit.
Wealthy Affiliate provides blog hosting that’s fast and secure. You also get a free SSL certificate, daily backups and 24/7 tech support so you can rest assured knowing your blog is in good hands.
6. Choose WordPress Theme
Your WordPress theme will determine a large part of your blog’s overall look and design. There are 1,000s of free and premium themes out there to choose from.
Personally, I use GeneratePress for all my blogs because it’s easy to use, fully customisable and looks great.
7. Build Your Blog
Next, click Build My Website and let Wealthy Affiliate’s SiteBuilder take care of the rest.
You can sign into your blog’s WordPress dashboard via SiteManager and you’ll be emailed your logons.
Day Three ☑️
8. Design A Cool Logo
You can create a blog logo in two ways:
Make one yourself using free image creation software like Canva, or find a professional designer on Fiverr to make one for you for as little as $10.
9. Enter Site Identity
Go to Appearance, Customise and Site Identity to add a name and tagline to your blog.
10. Play With Customisation
Make the blog your own by changing the fonts, font sizes, colours, menus and overall layout.
60% of readers will see your blog on mobile devices so keep it simple. Go for black text on a white background and ditch the sidebar.
Day Four ☑️
11. Install Essential Plugins
WordPress plugins add extra functionality to your blog and you can add as many as you want, just don’t go overboard or you’ll slow your blog down.
Essential plugins you need are The SEO Framework plugin to be able to add meta titles and descriptions for each of your blog posts, EWWW Image Optimizer for faster loading images and Antispam Bee to keep out comment spam.
12. Connect Google Analytics
Google Analytics lets you track how many blog visitors you’re getting, how they got there and how they behave once they land on your blog.
Our free Commission Academy course will walk you through this click-by-click.
13. Set Up Search Console
Search Console shows you how many impressions and clicks your blog gets from Google and helps you fix any mobile or usability issues early on to maximise traffic potential.
Day Five ☑️
14. Create Important Pages
Go to Pages, Add New. There are 4 main pages you need to add to your blog:
- About page – Introduce yourself and tell people what your blog will help them achieve
- Contact page – give readers a way they can connect with you
- Privacy policy
- Affiliate disclosure
For done-for-you privacy policy and affiliate disclosure templates, log into WealthyAffiliate.com, go to Websites and SiteContent and simply copy and paste.
15. Register Email Address
Create a specific email address for your blog (i.e. [email protected]) or add a new email forward by heading over to SiteManager and then SiteEmail.
16. Create Gravatar Account
Go to Gravatar and upload your profile image. This image will then be used for your author profile and comment replies.
Day Six ☑️
17. Research Keywords
Keywords are questions and phrases people search in Google. Use the Mangools keyword tool to find 20-30 blog post ideas to write about.
Target one keyword per post and include the keyword in your heading, intro and naturally throughout the post to ensure high search engine rankings and traffic.
18. Set Blogging Schedule
Take your blog post ideas and add them to your editorial calendar.
Consistency is key, so be realistic about how much time you can put into creating content for your blog and, if possible, set up a designated workspace.
19. Publish First Blog Post
Now you’ve started your blog, it’s time to start blogging!
You’re writing for the web so keep paragraphs short and break up blocks of text with images and bulletpoints for easier reading.
Use these sites to find royalty-free blog post images and use Grammarly for catching silly spelling mistakes and typos.
Day Seven ☑️
20. Join Affiliate Programs
Affiliate marketing is the single most lucrative way to monetise your blog.
Think about what relevant products and services you could recommend to readers and join affiliate programs like Amazon to get your unique affiliate link.
Add links to your content to earn a commission every time someone clicks through and buys something.
21. Add Ezoic Ads
When it comes to putting ads on your blog and making money, many bloggers make the mistake of thinking Google Adsense is the only option.
Ezoic is the much smarter option, paying $10 per 1,000 views.
22. Launch An Email List
Sign up to AWeber to add an email signup form to your blog and start building an email list of loyal subscribers.